A well-maintained bike is a joy to ride and maneuver. However, some riders neglect to check and maintain their Harley.
Fork seals are one of the parts that need attention. These rings keep engine oils from leaking. However, the seals will eventually fail because of normal wear and tear.
Are you intimidated by the idea of replacing these key components? It can be tricky, but you can quickly learn how to change the fork seals on a Harley Davidson.
Table of Contents
How Will You Know That Your Fork Seals Need Changing?
You will most likely notice if the fork seals are weakening. They give away with time and you will notice some play between the stanchion and the leg. If you’re going to replace the seals, you should change the bushes too because they are part of the seal.
Realistically, you’ll know when you have to change your seals because when they give away, you’ll notice a considerable amount of oil leaking from them.
How to Change Fork Seals on a Harley Davidson?
Before we get into the entire process of changing your fork seals, there are some things you need to do.
- Ensure that you create a designated working space to clean your fork seals and other parts. Engine oils can stain furniture and other materials.
- Remember to replace one fork seal at a time. You don’t want to risk opening them both.
- Both fork seals wear out differently. Therefore, you don’t want to mix any of them. Work on one fork seal, replace it, and move on to the next.
Now that we have this out of the way, we can finally get into the process of replacing the fork seals.
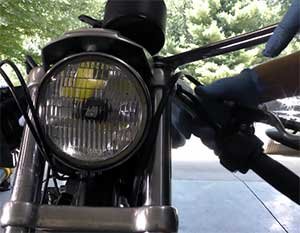
Loosen the Sealing Knobs
Before you safely jack the front end of your bike, ensure that you loosen the sealing knobs on the fork cylinders. You can find these sealing knobs close to your Harley’s handlebars. Unfasten these screws so you can safely jack up your bike.
Remove the Calipers
Now, once you’ve correctly jacked up your bike, you should remove the calipers, mudguard, and wheel. This is necessary because accessing the seals becomes much easier. You also avoid damaging these other items. It’s alright if you just tie the brake calipers with a length of cable. At this time, you’re not going to operate the hydraulic system. After removing the brake calipers, remember not to operate the brake levers.
Drain Out the Oil
Removing all of the oil from the fork tubes is one of the trickiest steps in the entire process.
- Remove the seals with a six-millimeter hex socket.
- Once you’ve safely removed the tubes, drain out the oil into a container or bowl. Don’t forget to work with one fork at a time.
- If you want to remove the oil faster, push the fork in and out a couple of times. Don’t push the fork too fast though, as you don’t want to damage anything.
- Remember to take notes on the position of each item. Once you’re done with the entire process, this lets you know exactly how to put them back in.
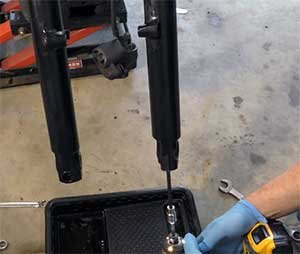
Remove the Fork Tube From the Bike
To remove the fork tubes from the bike, you need to do the following:
- Remove the nuts that fasten them in place. You will find them near the handle of the bike.
- Grab your torque wrench and loosen the triple-tree clamp bolts.
- Ensure that you hold each tube while unfastening the triple-tree bolt. These bolts hold the tubes in place. Once they’re off, your tubes might hit the ground.
Remove the Caps From the Seals

Place the tubes on a table. To remove the seal from the tube, you will need to:
- Pop the cap off from the lower legs using a flat-head screwdriver. Place the screwdriver on the cap and hit it with decent force. This will loosen the cap and make it easier to remove.
- Now, the seals are under these caps. Once the caps are off, repeat the same process with the seals. Don’t worry about damaging the seals because you’re going to replace them anyway.
- Ensure that you remove all the items that are inside the tubes. These include the lower plunger assembly and the snap ring that needs to be removed. You can remove the ring with a straight-head screwdriver.
Remove the Seals
This is what you’ve been waiting for. After completing all the previous steps, you can now take out the worn-out fork seal.
- Grasp the slider comfortably. Then, pull the fork tube several times in a smooth jerking motion to remove the seal from the slider.
- Remember, the seal will only come out of the slider if the fork has a guide bushing. The Harley has one, but other bikes may not.
- If you’re going to unfasten the fork further to check for damage, you should go through your bike’s manual.
- Remember that removing the fork completely entails replacing several parts like the slide bushings and O-rings.
- Once you’ve cleaned the fork and taken the new seals, start reassembling it. Refer to your notes.
- Place the screws that grasp the damping rods with new copper washers at the end of each slider.
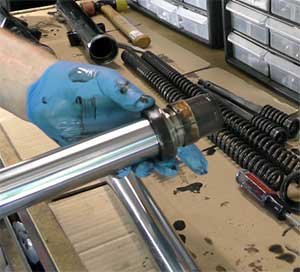
Replacing the Seals

- Before placing the new seal, apply just a little bit of grease on the outside of the seal. This will make it easier to fit the new part into the slider.
- Apply more grease on the sealing groove to prevent any damage when you set the fork back up again.
- To insert the new seal, you should use a fork seal driver. There’s nothing to worry about if you don’t have one. You can use a pipe as well.
- Tap to drive the seal in. Make sure to utilize the old seal as an underlay before you start tapping. You don’t need to tap too hard to push the new seal in. No matter what you do, don’t use any sharp objects to push the seal in.
- Once the seal’s driven well enough into the slider, you should be able to place the circlip back into its groove. Remember to include all the components you removed from the old seals.
Filling the Seals with Fork Oil

You’re practically finished with replacing your fork seals. All you need to do now is fill your fork tube with fork oil. You can either fill the tube in your workplace or directly into the bike. Do what makes you comfortable. I personally like to fill the fork oil on the bike.
Remember to use oil with the best viscosity for your bike. Put in the exact quantity of oil your fork tube needs. Go through your bike repair manual to check how much oil the fork tube needs. Usually, a Harley needs 10.2 ounces or 300 milliliters of fork oil.
Do a Test Ride
Once you’ve reassembled all the parts perfectly, you can now lower your bike from the jack. Remember to do a test ride to see if the fork seals are leaking with oil again.
If you don’t know where to find any of these parts, go through your bike’s service manual. It’s your best resource for learning the placement and functionality of all your bike’s components.
Why do Fork Seals Get Damaged?
If you ever see oil leaking from your fork seals, you will most likely need to replace them. Fork seals get damaged because of the friction and rust on the stanchion—the fork’s slider or tube. Since the tube constantly moves up and down, the seals experience a lot of friction.
Also, even the slightest imperfection can rupture the seal, causing the oil to leak. This is one of the most popular reasons that fork seals get damaged. Your forks seals require care, like the rest of your bike. It’s advisable not to use seal cleaning materials that slide under each ring. This pushes dirt and grit into the fork’s body, which will only damage the fork seals further.
How Long Should Fork Seals Last?
This depends on how often you ride your bike and where you ride it. For example, if you travel on dusty terrain or roads with lots of potholes, your fork seals might fail within a few years of purchase. Also, fork seals get damaged if you don’t use the bike for too long. Take note that your engine oil will last for a limited time. Change the oil at least once every two years.
Remember, the best way to keep your fork seals in the best condition is by servicing them every two years. You can do this yourself.
Conclusion
Is there a considerable amount of oil leakage from your bike? It may be time to get new fork seals. It’s certainly not easy to replace the fork seals on a Harley, or any bike for that matter. That’s why most people don’t even bother with this task. But if you keep putting this off, you increase the risk of damaging your Hog.
Do you need extra help with your fork tubes? Contact the nearest bike repair shop and understand what your bike needs.